Day 1 of Build 2015 has been great! The IoT inclusions especially have been very exciting for me.
We now have Windows 10 IoT core released and running on:
Raspberry Pi 2
MinnowBoard Max
Galileo
Also very interesting and exciting news is, we have Arduino support from Microsoft.
Windows Remote Arduino
Windows Virtual Shields for Arduino
Let’s start by installing Windows 10 IoT Core Preview on a Raspberry PI 2. I know many of you that bought a PI just to do this, I know I did. 🙂
Start by downloading the “Windows_IoT_Core_RPI2_BUILD” from “https://connect.microsoft.com/windowsembeddedIoT/Downloads“. I had to accept some EULAs and click around before anything appeared to be selected for download. It could have also been a timing problem as I was a bit eager to download and perhaps it was not available that soon.
The requirement for the installation is a Windows 10 Build 10069 or higher PC to copy the Windows 10 IoT installation onto an SD card . I downloaded the new Windows 10 Build 10074 ISO that was released today from “http://windows.microsoft.com/en-us/windows/preview-iso-update-1504“.
Install Windows 10. I ignored the recommendations and installed on a Virtual Machine (on VMWare) and not a physical PC. VMWare passes through the SD card without problems to Windows 10.
Once everything is installed, copy the “Flash.ffu” file from the downloaded “Windows_IoT_Core_RPI2_BUILD” zip file to a folder on the Windows 10 PC.
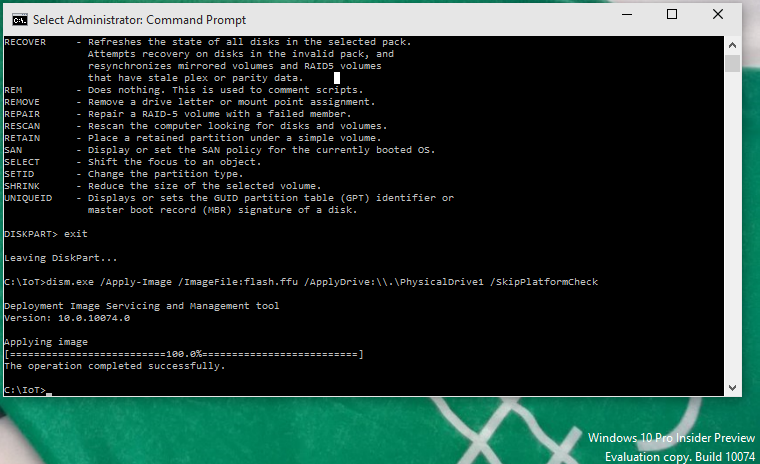
From an Administrator Command line run the following command:
diskpart
list disk
exit
Note the number of the disk associated with the SDCard.
Run the dism command replacing the N in “\PhysicalDriveN” to the number noted above.
dism.exe /Apply-Image /ImageFile:flash.ffu /ApplyDrive:\\.\PhysicalDriveN /SkipPlatformCheck
After a short wait, you should see: “Operation completed successfully”. Eject the SD card.
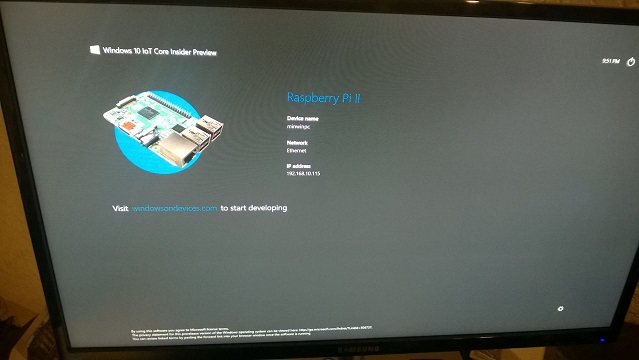
Insert the SD card into the SD card slot in the Raspberry PI 2. Plug the HDMI cable into the PI and of course the monitor. Plug the power cable into the Raspberry PI. After a few worrying minutes Windows 10 IoT should be all booted up. It will reboot once during the initial setup process and the interesting blocks displayed in-between the Windows Logo appearing and final boot-up seems normal.
Next step is to make it do something useful! 🙂

For full detail instructions you can follow this link: http://ms-iot.github.io/content/win10/SetupRPI.htm