This is a brief introduction to the pcDuino. I personally love it. It’s a very compact, high performance device but with compatibility with arduino shields. This is great for IOT use cases where more performance (or you could say intelligence) is needed. The applications for this is endless and I hope to be exploring many of those in blogs to come.
Today I will just start with getting to know the pcDuino, and will take baby steps and we will begin with installing Ubuntu on it. Out of interest, the pcDuino can also run Android 4.2.
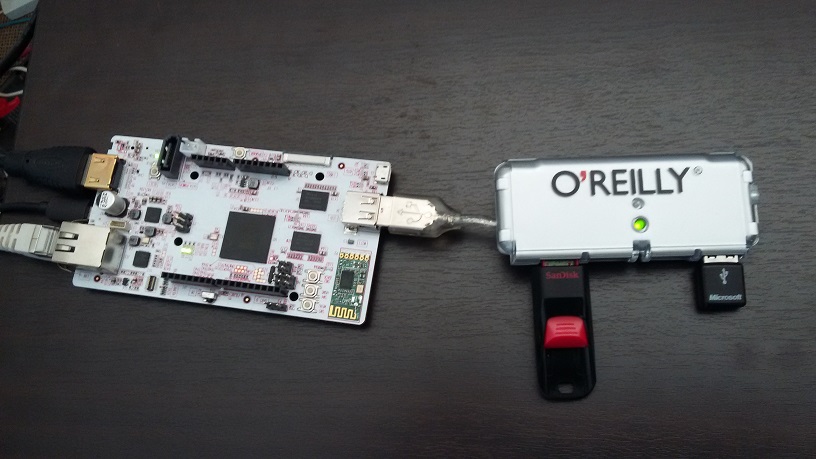
As the picture shows, the pcDuino is nice and compact, but has all the features you could want on a device. Having said that, there is only 1 Type A USB port. I suggest as per my photo, to use a USB hub at-least to get everything up and running. Many thanks to ‘O’Reilley’ for mine! 🙂 I am using a USB thumb drive, but to save a port a micro SD card could also be used. There is a SD card slot under the board next to the audio connector.
Overview (as per www.pcduino.com)
pcDuino3 is a high performance, cost effective single board computer. It runs operation systems such as Ubuntu Linux and Android. pcDuino3 has HDMI interface to output its graphic desktop screen. It could support multi-format 1080p 60fps video decoder and 1080p 30fps H.264 and MPEG4 video encoder with its built-in hardware video processing engine. It targets specially the fast growing demands from the open source community. pcDuino3 provides easy-to-use tool chains and is compatible with the popular Arduino ecosystem such as Arduino Shields.
Features & Highlights:
- 100% compatible with original Arduino Shields
- 100% compatible with Linux and Android
- Further support for:
- C, C ++ with GNU tool
- Java with standard Android SDK Python
- Arduino pin header, Aduino UNO Slots: 14x GPIO, 2x PW M, 6x ADC, 1x UART, 1xSPI, 1x I2C
- Ethernet 10M/100Mbps, WiFi, SATA
Below is the specs for the pcDuino 3 and 3B. I will be using a 3B in this post.
| CPU | AllWinner A20 SoC, 1GHz ARM Cortex A7 Dual Core | AllWinner A20 SoC, 1GHz ARM Cortex A7 Dual Core |
| GPU | OpenGL ES2.0, OpenVG 1.1, Mali 400 Dual Core | OpenGL ES2.0, OpenVG 1.1, Mali 400 Dual Core |
| DRAM | 1GB | 1GB |
| Onboard Storage | 4GB Flash, microSD card (TF) slot for up to 32GB | 4GB Flash, microSD card (TF) slot for up to 32GB |
| Video Output | HDMI 1.4 with HDCP support | HDMI 1.4 with HDCP support |
| OS |
|
|
| Arduino extension interface | Arduino sockets, same as Arduino UNO 14xGPIO, 2xPWM, 6xADC, 1xUART, 1xSPI, 1xI2C |
Arduino sockets, same as Arduino UNO 14xGPIO, 2xPWM, 6xADC, 1xUART, 1xSPI, 1xI2C |
| Network interface |
|
|
| Audio out |
|
|
| LCD | LVDS | LVDS |
| IR | IR receiver | IR receiver |
| SATA | SATA Host socket | SATA Host socket |
| Camera | CSI | CSI |
| Battery | Li-Poly Battery Interface | Li-Poly Battery Interface |
| USB | 1 x USB host, 1xUSB OTG | 1 x USB host, 1xUSB OTG |
| Power | 5V, 2000mA | 5V, 2000mA |
| Overall Size | 121mm x 65mm | 121mm x 65mm |
| Image download | Image for pcDuino3 | Image for pcDuino3B |
Installing Ubuntu 14
Downloand the Ubuntu 14 Nand image here: https://s3.amazonaws.com/pcduino/Images/v3/ubuntu14/pcduino3_livesuit_ubuntu14_GbpsMAC_20141231.tar.gz
Download Phoenix Suite for writing the Nand Image to the pcDuino from here: https://s3.amazonaws.com/pcduino/Tools/PhoenixSuit1.0.6.zip
I didn’t have much luck getting Phoenix Suite to work in Windows 8.1 64 bit. The USB driver does not install. I however had success on Windows XP and Windows 7.
You will need two micro USB cables for writing the nand image. You will also need a 5V 2A USB power supply. I am using an iPad charger which is working just fine.
Plug in the USB power supply into the power USB port. This is situated between the Ethernet port and the HDMI port. Then plug in the second USB cable into the micro USB OTG port, which is situated next to the USB type A port on the opposite side of the board. The other end of this cable will be plugged into the PC.
Run the Phoenix Suite software. It will oddly say, “No Device Attached”, but ignore that. Select “Firmware” which is top center of the dialog. And browse to the image. Note that this uses the “img” file, so be sure to extract the “gz” file that was downloaded. I used 7zip to do this. Click on the “Upgrade” button. Again ignore any messages that pop up.

On the pcDuino board press the “Upgrade” button. While holding the button, press the “Reset” button. These are both clearly marked on the board.
A popup will appear in Phoenix Suite: “Does mandatory format?” Click “Yes”.
A few minutes later you should be greeted with a message: “Upgrade Firmware Succeeded!” Plug in a HDMI cable, mouse, keyboard and reset the pcDuino. A moment later Ubuntu should boot and the GUI will appear on the HDMI monitor. Also note the Tx and Rx leds on the board will both be lit up indicating success.
This is just the first step to exploring the pcDuino. I hope it was helpful.