Xamarin Evolve 2016 – Arrival

Finally arrived in Orlando after a long flight from Cape Town via Dubai.      We are staying at the Fort Wilderness resort within Disney World.    The whole family has come along with, so this is definitely going to be an amazing week of family fun and Xamarin!


Fort Wilderness is amazing.  We are staying in log Cabins within a forest, a natural feel to it, but close enough to be in

the parks in a few minutes using the internal transit system.   I am not too sure though what peak traffic is like Orlando to the Xamarin conference at the Hyatt Regency, but will leave early just incase.


Forte Wilderness Disney World


Started the day with a trip to the Hollywood and then the Magic Kingdom.  Plenty of magic and also Star Wars which makes the whole family very happy.


First Order at Hollywood Studios


Disney Castle at the Magic Kingdom


Need some rest now before the big kick off of Xamarin Evolve 2016!!


Windows 10 IOT Remote Display Experience

With Microsoft Build 2016 complete, there are so many things to be looking at and trying out.   One of the more useful features for me right now is the new remoting functionality in Windows 10 IoT Insider Preview 10.0.14295.   I have this running on a Raspberry Pi 3 and I am busy with some work using an array of sensor telemetry.  Being able to see what is happening remotely make life far easier when building Universal Apps.

To configure this is very simple.    There is a new menu option added to the administration console called “Remote”.  This is accessible via the URL:  http://[ipaddress of pi]:8080.   If you haven’t changed the password the login should be:  “Administrator” and “p@ssw0rd”

IoT Remoting

Enable the Windows IoT Remote Server by ticking the box presented.


To access the Raspberry Pi remotely you need a client.   This is available in the Windows Store either by following the provided link, or just by searching for “Windows IoT” in the store.  https://www.microsoft.com/store/apps/9nblggh5mnxz


remote client


This will run on any Windows 10 device.   Just something to note: on a Windows 10 Mobile device (Lumia 950 XL in my case) you may have to set the device color scheme to light for the application text to be legible.  I’m sure this will be corrected in later builds.

iot client

Fill in the IP address of the Raspberry PI in the “Enter an IP address” text box and click / tap “Connect”.  You should now be seeing what the Raspberry Pi is displaying.

WP_20160403_16_42_25_Pro_LI
Remoting to a Windows 10 PC / Tablet
WIN_20160403_17_10_17_Pro
Remoting to a Lumia 950 XL


Build 2015: Windows 10 IoT Preview on a Raspberry Pi 2

Day 1 of Build 2015 has been great!   The IoT inclusions especially have been very exciting for me.


We now have Windows 10 IoT core released and running on:

Raspberry Pi 2
MinnowBoard Max
Galileo


Also very interesting and exciting news is, we have Arduino support from Microsoft.

Windows Remote Arduino
Windows Virtual Shields for Arduino


Let’s start by installing Windows 10 IoT Core Preview on a Raspberry PI 2. I know many of you that bought a PI just to do this, I know I did. 🙂


Start by downloading the “Windows_IoT_Core_RPI2_BUILD” from https://connect.microsoft.com/windowsembeddedIoT/Downloads.  I had to accept some EULAs and click around before anything appeared to be selected for download.  It could have also been a timing problem as I was a bit eager to download and perhaps it was not available that soon.


The requirement for the installation is a Windows 10 Build 10069 or higher PC to copy the Windows 10 IoT installation onto an SD card . I downloaded the new Windows 10 Build 10074 ISO that was released today from http://windows.microsoft.com/en-us/windows/preview-iso-update-1504.


Install Windows 10. I ignored the recommendations and installed on a Virtual Machine (on VMWare) and not a physical PC.  VMWare  passes through the SD card without problems to Windows 10.


Once everything is installed, copy the “Flash.ffu” file from the downloaded “Windows_IoT_Core_RPI2_BUILD” zip file to a folder on the Windows 10 PC.


From an Administrator Command line run the following command:


diskpart
list disk
exit


Note the number of the disk associated with the SDCard.


Run the dism command replacing the N in “\PhysicalDriveN” to the number noted above.


dism.exe /Apply-Image /ImageFile:flash.ffu /ApplyDrive:\\.\PhysicalDriveN /SkipPlatformCheck

After a short wait, you should see: “Operation completed successfully”. Eject the SD card.


success

Insert the SD card into the SD card slot in the Raspberry PI 2. Plug the HDMI cable into the PI and of course the monitor. Plug the power cable into the Raspberry PI. After a few worrying minutes Windows 10 IoT should be all booted up. It will reboot once during the initial setup process and the interesting blocks displayed in-between the Windows Logo appearing and final boot-up seems normal.


Next step is to make it do something useful! 🙂


rasp pi 2 rasp pi 1

For full detail instructions you can follow this link: http://ms-iot.github.io/content/win10/SetupRPI.htm

Running ASP .NET vNext on a pcDuino

Microsoft is doing a lot of great things at the moment.  One of these is the ability to run ASP .NET vNext away from a Windows Server, and away from IIS.    Being a ASP .NET Mvc developer for a few years now, the idea to run on any environment is quite liberating.


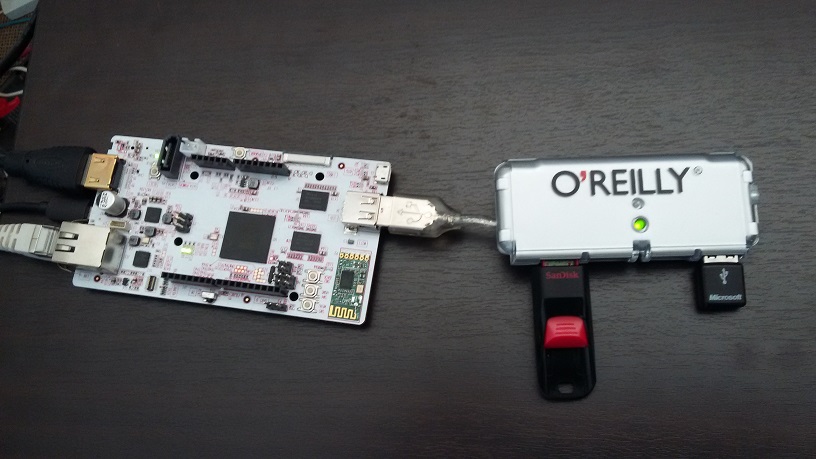
A pcDuino is a device with tons of potential.   It’s a powerful device and it really is a full “mini PC” with enough processing power to do interesting things like image processing.    But is small enough to be used in situations where you would uses an Arduino, Netduino, RFduino etc in the IoT or maker space.   The pcDuino also has an Ethernet port and on-board WiFi, so it is a rather compelling internet connected device.

Having deployed Mono on my board already, it was also a no brainer to extend that and to explore the potential of an internet connected device but leveraging ASP .NET vNext to do that.


asp net web server

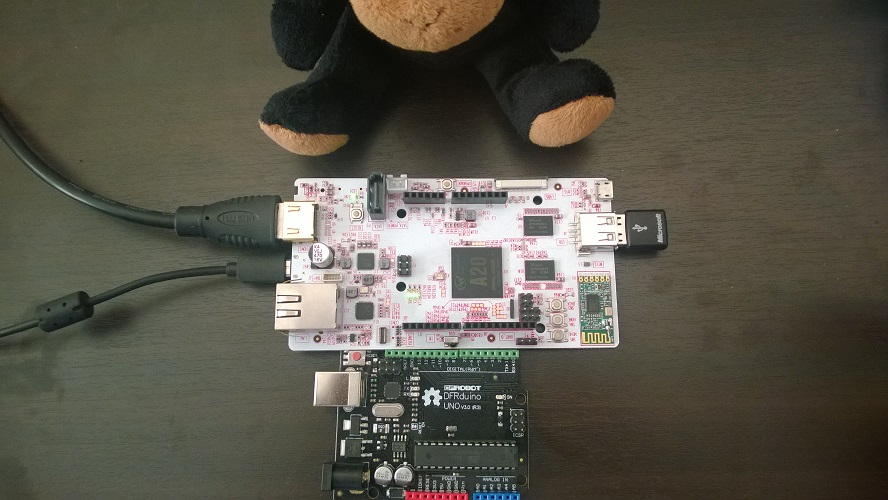
ASP .NET Web Server (with Arduino Uno and Xamarin Monkey used for scale)


To get started read these two blog posts:


Now that we have both Ubuntu and Mono installed, we can now begin getting ASP .NET vNext up and running.

To figure out how to do this, I referred to the ASP .NET github repository, “Getting Started” page.  This page can be found here:  https://github.com/aspnet/Home


Lets start by installing the necessary certificates.

$ CERTMGR=/usr/local/bin/certmgr
$ sudo $CERTMGR -ssl -m https://go.microsoft.com
$ sudo $CERTMGR -ssl -m https://nugetgallery.blob.core.windows.net
$ sudo $CERTMGR -ssl -m https://nuget.org
$ sudo $CERTMGR -ssl -m https://www.myget.org/F/aspnetvnext/
$ mozroots --import --sync


We need curl, so install that next

$ sudo apt-get install curl


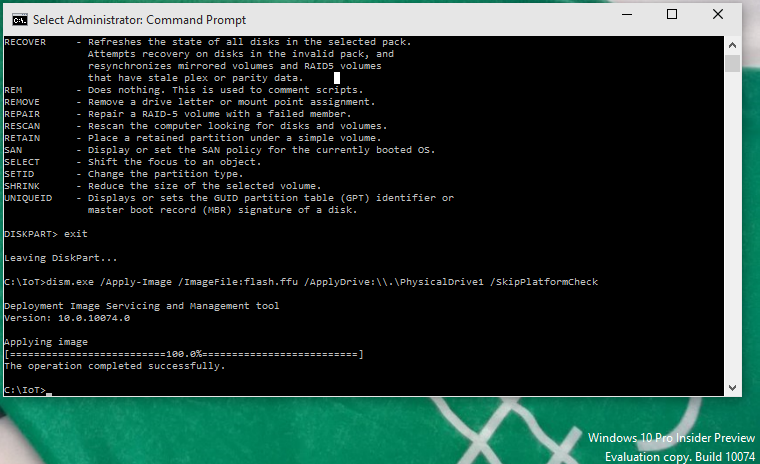
Download and execute the KVM installer on the ASP .NET site.   As of writing this,  the master branch has the 1.0.0-beta1, so we will use that.

$ curl https://raw.githubusercontent.com/aspnet/Home/master/kvminstall.sh | sh && source ~/.kre/kvm/kvm.sh
$ kvm upgrade


Check to see if the installation is correct, you should see the version number reflected with the list command.

$ kvm list


If git is not already installed, install git next.

$ sudo apt-get-install git


The web server ASP .NET vNext uses (Kestrel), is based on Libuv, so we need to install that next.

$ git clone https://github.com/libuv/libuv.git
$ cd libuv
$ sh autogen.sh
$ ./configure
$ make
$ make check
$ sudo make install


Now we need something to run.  Lets use one of the samples from the ASP .NET github repository.for simplicity.  Clone the aspnet repository.

$ git clone https://github.com/aspnet/Home


Focusing on the Mvc example, change to the directory “HelloMvc”.    To resolve and download the necessary dependencies for the project, execute a restore command on the package manager “KPM”.

$ cd Home/samples/HelloMvc
$ kpm restore


We need to set up a symbolic link for libuv to avoid any “Object Reference not set to an instance of an object” errors.    This is not the most helpful or informative of error messages, but we get what it means.

 $ ln /usr/local/lib/libuv.so -sf ~/.kpm/packages/Microsoft.AspNet.Server.Kestrel/1.0.0-beta1/native/darwin/universal/libuv.dylib


Run the Kestrel server

$ LD_LIBRARY_PATH=/usr/local/lib k kestrel


If all goes well you should see “Started” appear on the command line.

$ Started


The default port for kestrel is 5004.   As a test navigate to “http://localhost:5004” using the internal pcDuino Chromium browser.     The sample ASP .NET Mvc application should appear as below.

 asp .net vnextAsp .NET Mvc site up and running on Mono 3.12.0


Find the ip address of the pcDuino using the ifconfig command.

$ ifconfig


Use this ip address from a remote device (or pc’s) browser.   The great feature of the pcDuino that it is equipped with both an Ethernet port and WiFi so connectivity is very easy and convenient.


Congratulations you now have a Mono / NET powered IOT device running ASP .Net vNext!   A mobile wireless web server / web connected device has endless potential.   In future blog posts I hope to explore some of those.


I hope this was helpful!

Mono Compilation on a pcDuino

Being a C# .NET developer and a Xamarin developer, it was just a matter of time before I had to have Mono on my pcDuino.    A default package installation of Mono on any ARM (ARMhf) device (like the pcDuino with it’s A20 processor) at this moment is unfortunately not possible as it’s not available yet.  However luckily Mono can be compiled directly on the pcDuino.   I’ll share my exploration of building Mono 3.12.0 here.

Attempting to install the current Mono packages on a system with an ARMhf processor will currently yield the following unfriendly error messages:

sudo apt-get install mono-devel
Reading package lists... Done
Building dependency tree
Reading state information... Done
Some packages could not be installed. This may mean that you have
requested an impossible situation or if you are using the unstable
distribution that some required packages have not yet been created
or been moved out of Incoming.
The following information may help to resolve the situation:

The following packages have unmet dependencies:
mono-devel : Depends: mono-runtime (>= 2.10.1) but it is not going to be installed
Depends: libmono-cecil-private-cil (>= 3.12.0) but it is not going to be installed
Depends: libmono-cecil-private-cil (< 3.12.1) but it is not going to be installed
Depends: libmono-codecontracts4.0-cil (>= 1.0) but it is not going to be installed
Depends: libmono-compilerservices-symbolwriter4.0-cil (>= 3.6.0) but it is not going to be installed
Depends: libmono-corlib2.0-cil (>= 3.2.8) but it is not going to be installed
Depends: libmono-corlib4.5-cil (>= 3.12.0) but it is not going to be installed
Depends: libmono-peapi2.0a-cil (>= 3.2.8) but it is not going to be installed
Depends: libmono-peapi4.0a-cil (>= 3.2.8) but it is not going to be installed
Depends: libmono-relaxng4.0-cil (>= 2.10.1) but it is not going to be installed
Depends: libmono-security2.0-cil (>= 3.0.6) but it is not going to be installed
Depends: libmono-security4.0-cil (>= 3.0.6) but it is not going to be installed
Depends: libmono-system-componentmodel-composition4.0-cil (>= 3.0.6) but it is not going to be installed
Depends: libmono-system-componentmodel-dataannotations4.0-cil (>= 3.2.3) but it is not going to be installed
Depends: libmono-system-configuration-install4.0-cil (>= 1.0) but it is not going to be installed
Depends: libmono-system-configuration4.0-cil (>= 1.0) but it is not going to be installed
Depends: libmono-system-core4.0-cil (>= 3.2.8) but it is not going to be installed
Depends: libmono-system-data-linq4.0-cil (>= 1.0) but it is not going to be installed
Depends: libmono-system-data2.0-cil (>= 3.12.0) but it is not going to be installed
Depends: libmono-system-data4.0-cil (>= 3.12.0) but it is not going to be installed
Depends: libmono-system-numerics4.0-cil (>= 1.0) but it is not going to be installed
Depends: libmono-system-runtime-serialization4.0-cil (>= 1.0) but it is not going to be installed
Depends: libmono-system-runtime4.0-cil (>= 2.10.1) but it is not going to be installed
Depends: libmono-system-security4.0-cil (>= 1.0) but it is not going to be installed
Depends: libmono-system-servicemodel4.0a-cil (>= 3.2.3) but it is not going to be installed
Depends: libmono-system-web-services4.0-cil (>= 1.0) but it is not going to be installed
Depends: libmono-system-web2.0-cil (>= 2.10.3) but it is not going to be installed
Depends: libmono-system-xml-linq4.0-cil (>= 3.0.6) but it is not going to be installed
Depends: libmono-system-xml4.0-cil (>= 3.12.0) but it is not going to be installed
Depends: libmono-system2.0-cil (>= 3.12.0) but it is not going to be installed
Depends: libmono-system4.0-cil (>= 3.12.0) but it is not going to be installed
Depends: libmono2.0-cil (>= 3.6.0) but it is not going to be installed
Depends: mono-mcs (= 3.12.0-0xamarin3) but it is not going to be installed
Depends: mono-gac (= 3.12.0-0xamarin3) but it is not going to be installed
Depends: mono-xbuild (= 3.12.0-0xamarin3) but it is not going to be installed
Depends: libmono-cil-dev (= 3.12.0-0xamarin3) but it is not going to be installed
Depends: libmono-2.0-dev (>= 3.12.0-0xamarin3) but 3.2.8+dfsg-4ubuntu1 is to be installed
Recommends: mono-csharp-shell but it is not going to be installed
E: Unable to correct problems, you have held broken packages.


To solve this problem we will make our own ARMhf targeted build. Let’s start by finding a USB memory stick or a SD card with sufficient space.   The Mono source repository is quite large and it occupies about two gigabytes of storage. I would suggest a size of four gigabytes or more (I used an eight gigabyte module myself).  Make sure it’s formatted to the Ext file system.  FAT32 will not work for compilation.  I wasted a good couple of hours with error messages caused simply by the chaos caused using the wrong file system.


To figure out what to do, I referred to the official Mono documentation for the installation steps I list below.   These compilation instructions can also be found here on the Mono site:  http://www.mono-project.com/docs/compiling-mono/linux/


Let’s first make sure we have the tools available to build Mono.


$ apt-get install git autoconf libtool automake build-essential gettext


Clone the Mono source code from the git repository.


$ cd /media/[path to your external media]
$ git clone git://github.com/mono/mono.git


The cloning of the Git repository can take a while depending on the internet connection.   The size of the repository is just under two gigabytes so try to be patient.


The entire process of compilation will take about five hours on the pcDuino, so best to do this overnight..

$ cd mono
$ git checkout mono-3.12.0-branch
$ git submodule init
$ git submodule update --recursive
$ git submodule

$ ./autogen.sh --prefix=/usr/local --with-sgen=yes --with-large-heap=yes --with-xen_opt=no --enable-parallel-mark --with-libgdiplus=/usr/local/lib
$ make get-monolite-latest
$ make EXTERNAL_MCS="${PWD}/mcs/class/lib/monolite/gmcs.exe"
$ make

Build in progress!


monocompiling


Compiling is complete!  So to conclude we will install the build locally.

$ sudo make install


Once installed check the Mono version.

$ mono --version


If you are seeing the message below, congratulations you have successfully built Mono 3.12 on your device!

Mono JIT compiler version 3.12.0 (mono-3.12.0-branch/501f5a9 Mon Feb 2 12:41:29 UTC 2015)
Copyright (C) 2002-2014 Novell, Inc, Xamarin Inc and Contributors. www.mono-project.com
TLS: __thread
SIGSEGV: normal
Notifications: epoll
Architecture: armel,vfp+hard
Disabled: none
Misc: softdebug
LLVM: supported, not enabled.
GC: sgen


For the non-adventurous or if you are just needing to save time, you can download my Mono-3.12.0 package here:  http://1drv.ms/1zvLtgN


Now that we have mono installed we can explore some pcDuino .net (c#) related topics in future posts.

Getting Started with a pcDuino

This is a brief introduction to the pcDuino.    I personally love it.  It’s a very compact, high performance device but with compatibility with arduino shields.   This is great for IOT use cases where more performance (or you could say intelligence) is needed.   The applications for this is endless and I hope to be exploring many of those in blogs to come.

Today I will just start with getting to know the pcDuino, and will take baby steps and we will begin with installing Ubuntu on it.  Out of interest, the pcDuino can also run Android 4.2.


PcDuino


As the picture shows, the pcDuino is nice and compact, but has all the features you could want on a device.  Having said that, there is only 1 Type A USB port.   I suggest as per my photo, to use a USB hub at-least to get everything up and running.  Many thanks to ‘O’Reilley’ for mine! 🙂   I am using a USB thumb drive, but to save a port a micro SD card could also be used.   There is a SD card slot under the board next to the audio connector.


Overview (as per www.pcduino.com)

pcDuino3 is a high performance, cost effective single board computer. It runs operation systems such as Ubuntu Linux and Android. pcDuino3 has HDMI interface to output its graphic desktop screen. It could support multi-format 1080p 60fps video decoder and 1080p 30fps H.264 and MPEG4 video encoder with its built-in hardware video processing engine. It targets specially the fast growing demands from the open source community. pcDuino3 provides easy-to-use tool chains and is compatible with the popular Arduino ecosystem such as Arduino Shields.

Features & Highlights:

  • 100% compatible with original Arduino Shields
  • 100% compatible with Linux and Android
  • Further support for:
  • C, C ++ with GNU tool
  • Java with standard Android SDK Python
  • Arduino pin header, Aduino UNO Slots: 14x GPIO, 2x PW M, 6x ADC, 1x UART, 1xSPI, 1x I2C
  • Ethernet 10M/100Mbps, WiFi, SATA


Below is the specs for the pcDuino 3 and 3B.   I will be using a 3B in this post.


CPU AllWinner A20 SoC, 1GHz ARM Cortex A7 Dual Core AllWinner A20 SoC, 1GHz ARM Cortex A7 Dual Core
GPU OpenGL ES2.0, OpenVG 1.1, Mali 400 Dual Core OpenGL ES2.0, OpenVG 1.1, Mali 400 Dual Core
DRAM 1GB 1GB
Onboard Storage 4GB Flash, microSD card (TF) slot for up to 32GB 4GB Flash, microSD card (TF) slot for up to 32GB
Video Output HDMI 1.4 with HDCP support HDMI 1.4 with HDCP support
OS
  • Ubuntu 12.04
  • Android 4.2
  • Ubuntu 12.04
  • Android 4.2
Arduino extension interface Arduino sockets, same as Arduino UNO
14xGPIO, 2xPWM, 6xADC, 1xUART, 1xSPI, 1xI2C
Arduino sockets, same as Arduino UNO
14xGPIO, 2xPWM, 6xADC, 1xUART, 1xSPI, 1xI2C
Network interface
  • Built-in WiFi
  • Ethernet 10M/100Mbps
  • Built-in WiFi
  • Ethernet 10M/100Mbps/1Gbps
Audio out
  • 3.5mm analog audio interface
  • I2S stereo digital audio interface
  • 3.5mm analog audio interface
  • I2S stereo digital audio interface
LCD LVDS LVDS
IR IR receiver IR receiver
SATA SATA Host socket SATA Host socket
Camera CSI CSI
Battery Li-Poly Battery Interface Li-Poly Battery Interface
USB 1 x USB host, 1xUSB OTG 1 x USB host, 1xUSB OTG
Power 5V, 2000mA 5V, 2000mA
Overall Size 121mm x 65mm 121mm x 65mm
Image download Image for pcDuino3  Image for pcDuino3B


Installing Ubuntu 14

Downloand the Ubuntu 14 Nand image here:   https://s3.amazonaws.com/pcduino/Images/v3/ubuntu14/pcduino3_livesuit_ubuntu14_GbpsMAC_20141231.tar.gz


Download Phoenix Suite for writing the Nand Image to the pcDuino from here:  https://s3.amazonaws.com/pcduino/Tools/PhoenixSuit1.0.6.zip

I didn’t have much luck getting Phoenix Suite to work in Windows 8.1 64 bit.  The USB driver does not install.  I however had success on Windows XP and Windows 7.


You will need two micro USB cables for writing the nand image.   You will also need a 5V 2A USB power supply.   I am using an iPad charger which is working just fine.


Plug in the USB power supply into the power USB port.  This is situated between the Ethernet port and the HDMI port.     Then plug in the second USB cable into the micro USB OTG port, which is situated next to the USB type A port on the opposite side of the board.   The other end of this cable will be plugged into the PC.


Run the Phoenix Suite software.     It will oddly say, “No Device Attached”, but ignore that.      Select “Firmware” which is top center of the dialog.   And browse to the image.   Note that this uses the “img” file, so be sure to extract the “gz” file that was downloaded.   I used 7zip to do this.   Click on the “Upgrade” button.  Again ignore any messages that pop up.

phoenix

On the pcDuino board press the “Upgrade” button.   While holding the button, press the “Reset” button.    These are both clearly marked on the board.


A popup will appear in Phoenix Suite: “Does mandatory format?”   Click “Yes”.


A few minutes later you should be greeted with a message:  “Upgrade Firmware Succeeded!”   Plug in a HDMI cable, mouse, keyboard and reset the pcDuino.   A moment later Ubuntu should boot and the GUI will appear on the HDMI monitor.  Also note the Tx and Rx leds on the board will both be lit up indicating success.


This is just the first step to exploring the pcDuino. I hope it was helpful.

Rolling your own Android Emulator

In certain situations the emulators provided just don’t cut it.      It is actually relatively simply to create your own by just using an x86 image of Android.   It is also possible to add additional features to the emulator for testing by virtue of daemons installed.


Download Android X86 iso image of choice from http://www.androidx86.org/download


Boot ISO in Hyper Visor of choice. (Android will work in VMWare, VirtualBox and Hyper-V) 


Install any GPS, Accelerometer, orientation etc spoof daemons of choice


Android Debugger Bridge  (ADB)


Once Android is booted (first time), run terminal (on Android) and issue commands below

o setprop service.adb.tcp.port 5555

o stop adbd

o start adbd

o or adb tcpip 5555 


From the development PC (issue commands via CMD – adb can be found in platform-tools folder in you Android SDK folder):

o adb connect [Android emulator ip address]


If the ip not known from Android terminal command: (busybox ifconfig)  Connect as normal from Visual Studio.   Should appear as Hyper Visor name, ie VMWare etc